
🪄 AI Summary
Heading 1
Heading 2
Heading 3
Heading 4
Heading 5
Heading 6
Lorem ipsum dolor sit amet, consectetur adipiscing elit, sed do eiusmod tempor incididunt ut labore et dolore magna aliqua. Ut enim ad minim veniam, quis nostrud exercitation ullamco laboris nisi ut aliquip ex ea commodo consequat. Duis aute irure dolor in reprehenderit in voluptate velit esse cillum dolore eu fugiat nulla pariatur.
Block quote
Ordered list
- Item 1
- Item 2
- Item 3
Unordered list
- Item A
- Item B
- Item C
Bold text
Emphasis
Superscript
Subscript
The Difference Between a Good Video Shoot and a Chaotic One
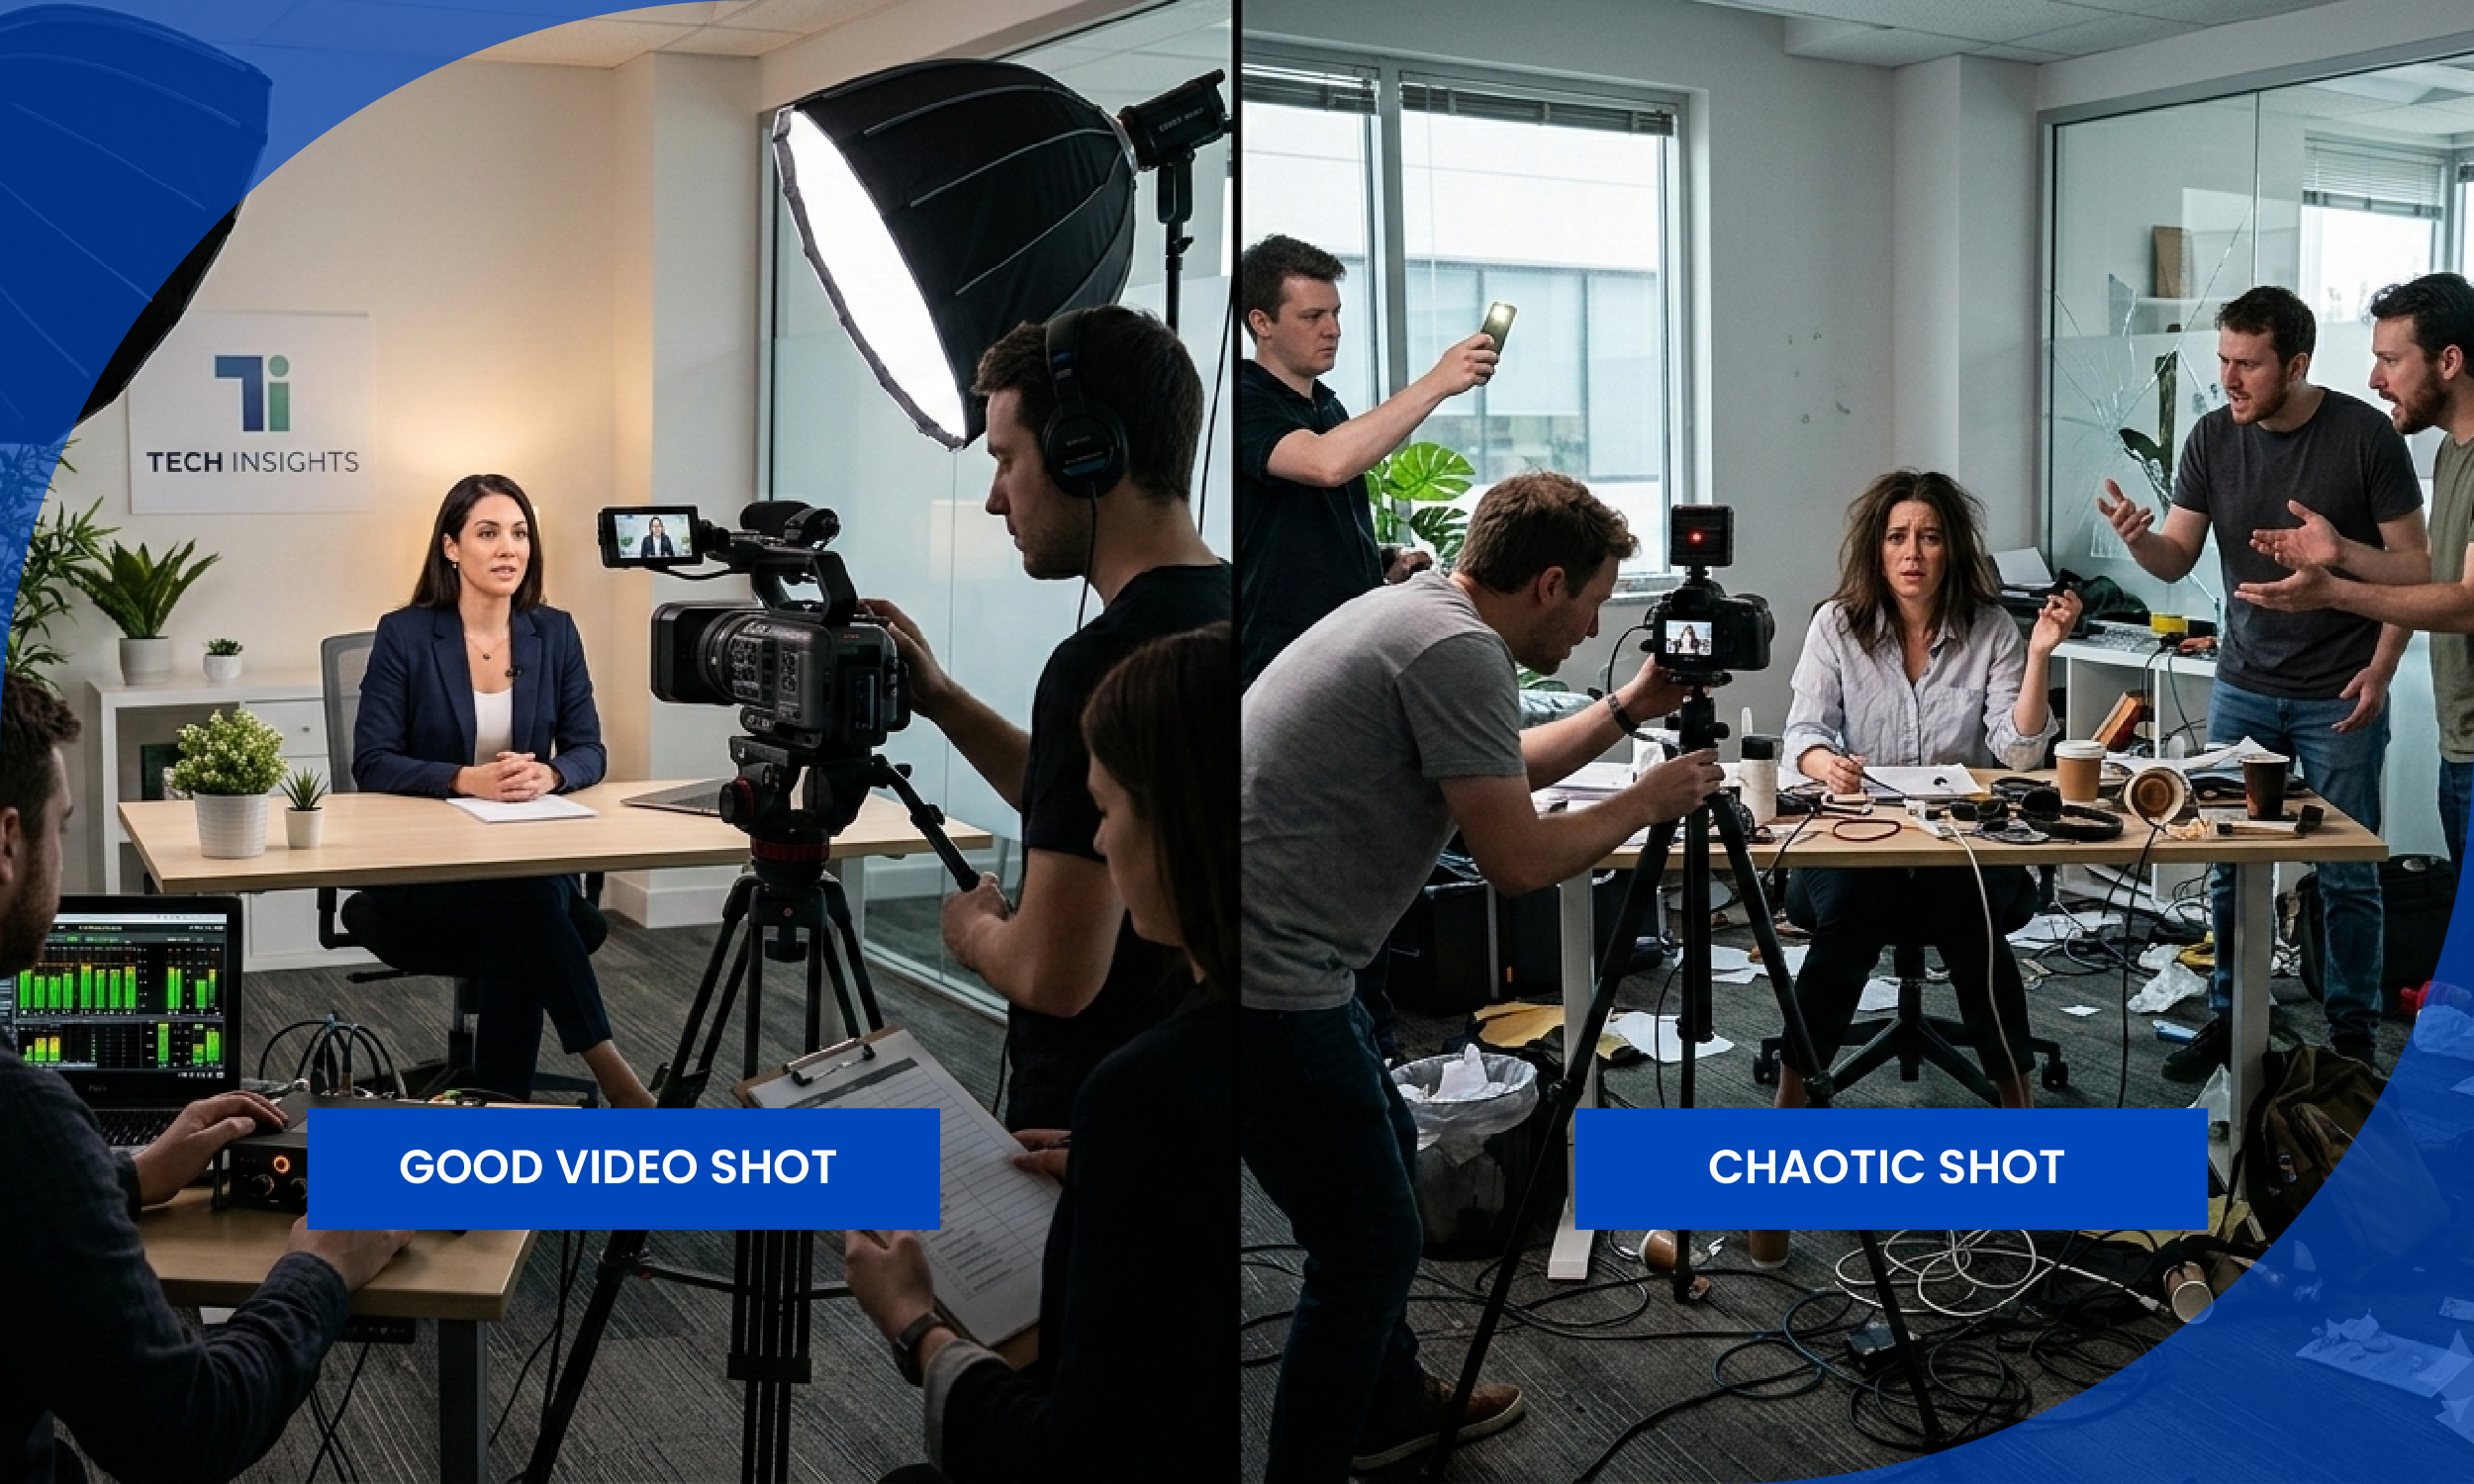
You block out a full day to shoot your brand video. You bring in your team, set up the camera, get the lights right. Then two hours in, you realize you forgot to shoot the product close-up. Or your subject was only available in the morning and now that shot is gone forever. You go into the edit and something crucial is missing.
This happens to almost every beginner. And it keeps happening until they discover the single most important pre-production tool in video: a shot list.
Without a detailed shot list, a production can easily go off track, wasting valuable time and resources. Whether you are an industry professional or an amateur just starting out, understanding and utilizing a shot list is paramount to the success of your video-making venture.
This guide will teach you exactly what a shot list is, why you need one, what goes in it, and how to build one step by step before your next shoot. Whether you are a solo content creator filming on a smartphone or a marketing team producing a full brand film, this process applies to you.
What Is a Shot List?
A shot list is the backbone of any successful video or film production. Think of it as a detailed checklist that outlines all the shots you need to capture for each scene, ensuring nothing is overlooked during filming. By combining the script and storyboard with practical instructions like camera shots, movements, lighting setups, props, and dialogue notes, a shot list transforms creative ideas into a clear, actionable plan.
In plain terms: a shot list is a document you create before you press record. It tells you and your team exactly what footage you need to capture, in what order, and how. Nothing is left to guesswork or memory on the day of the shoot.
A shot list is a strategic document that lists all the shots to be shot in a specific shoot day. It is a way for the director to clearly communicate the vision of the film, TV series, photography shoot, or commercial with the DP and first AD. The shots list includes key details such as shot size, type, camera movement, lens and gear requirements. A shotlist is like a shopping list to make sure you get every shot you need to tell the story.
Why Every Video Creator Needs a Shot List (Not Just Hollywood Filmmakers)
Many beginners assume shot lists are for big productions with large crews. That thinking is one of the most expensive mistakes in video production.
Knowing how to write an effective shot list can be the difference between a smooth shoot day and one that is full of last-minute scrambling. Professional filmmaking teams do not just show up and wing it. They rely on a well-structured plan that guides them from the very first setup to the final frame. Without that plan, even the most creative ideas can unravel under time constraints, budget pressures, and the logistics of managing crew members and gear.
Here is what a shot list does for you specifically:
1/ Complete coverage. You will not miss a crucial angle in post-production. Every shot you planned is accounted for before you wrap the day.
2/ Clear communication. The entire team understands the creative vision. Nobody is guessing what you want or asking the same questions over and over on set.
3/ Budget control. No costly reshoots because you captured everything the first time. Reshoots cost time, money, and in many cases the chance to recapture a moment that has passed.
4/ Better editing. Having a shot list also makes post-production easier later on since your editor can use it to reference which pieces go where when they are assembling the finished product.
5/ Time management. By listing shots in a logical sequence, you can optimize the shooting schedule and minimize changes or rearrangements on set.
11 Core Elements of Every Shot List
When you are ready to create your first shot list, it is important to include the core elements that will keep your production organized and efficient. Start by assigning a shot number to each entry, then note the scene, location, and a brief description of the shot. Be sure to specify the camera angle, shot type, and shot size, as these details help the crew understand exactly how each moment should be captured. Do not forget to include any sound requirements, the cast involved, and special notes or technical details that might affect the process.
Here is a breakdown of each element:
1. Scene Number
This number corresponds to the specific section of the script you are filming. For example, if a script's kitchen exterior scene is labeled Kitchen 1.2, you will use 1.2 on your shot list as a reference point for the cast and crew.
2. Shot Number
Each shot is listed in a new row and assigned a new number in chronological order, starting from 1. This is your reference point throughout the shoot. When the director calls for shot 14, everyone knows exactly what is being filmed.
3. Location
A shot list should first be organized by filming location, as grouping shots in the same location makes it easier to film everything you need at once. For example, if you are going to shoot a scene in a library at the beginning and at the end of a film, your shot list should be organized to show that both shots are needed in that location.
4. Shot Size
Shot size tells your camera operator how much of the subject should fill the frame. There are many ways in which you can frame your subject, from seeing their entire body to only their eyes. Generally speaking, we can break this down into three main shot sizes: Long, Medium, and Close. Long shots show the subject from a distance, emphasizing place and location, while Close shots reveal details of the subject and highlight emotions of a character.
Here is a quick reference for the most common shot sizes:
5. Camera Angle
Camera angles can totally change the meaning of a shot. As you prepare your shot list, it helps to remember all the options. The most common camera angles every creator should know are:
Eye Level - Shot taken with the camera approximately at human eye level, resulting in a neutral effect on the audience. This is the default for most interviews and talking head videos.
High Angle - Subject is photographed from above eye level. This can have the effect of making the subject seem vulnerable, weak, or frightened.
Low Angle - Subject is photographed from below eye level. This can have the effect of making the subject look powerful, heroic, or dangerous.
Over the Shoulder - A popular shot where a subject is shot from behind the shoulder of another, framing the subject anywhere from a medium to close-up. Extremely common in interview and conversation footage.
Bird's Eye View - A high-angle shot taken from directly overhead and from a distance. The shot gives the audience a wider view and is useful for showing direction and that the subject is moving, to highlight spatial relations, or reveal to the audience elements outside the boundaries of the character's awareness.
6. Camera Movement
This describes whether the camera stays still or moves during the shot. A pan shot involves moving the camera horizontally across the scene. A dolly shot entails physically moving the camera on a track or wheeled platform to steadily approach or follow a subject. This provides a natural, polished look for your film.
Common movements to include in your shot list:
- Static - Camera does not move
- Pan - Camera rotates horizontally on a fixed point
- Tilt - Camera rotates vertically on a fixed point
- Tracking - Camera physically follows the subject
- Dolly In or Out - Camera moves toward or away from the subject on a track
- Handheld - Camera is carried, creating a naturalistic feel
7. Shot Description
A one or two sentence description of exactly what happens in the shot. Be specific. "Close up of hands typing on keyboard, shot from above" is far more useful than just writing "hands."
8. Lens or Equipment Notes
Use this column to record which size camera lens you are using for the scene. For example 24mm, 50mm, or 200mm. Use another column to estimate how long it will take to set up each shot, which helps you build your schedule and timings for each day.
9. Cast or Subject
Note who is in the shot. This is useful for actors/ creators, who need to understand the sequence of shots and for costume and makeup teams who need to ensure character consistency across scenes.
10. Setup Time
When you calculate your set-up and shoot times for each shot, the start time can be estimated. Pro tip: setups can eat up a lot of time over the course of a day. Once the camera is set with specific equipment or lens, shoot as many setups with that gear before switching.
11. Notes
Our film shotlist template has two notes sections: notes for specific shots and notes for the whole scene. These could be used in a variety of ways, including for setups, meal breaks, and other reminders.
Step by Step: How to Create a Shot List Before Your Video Shoot
Step 1: Start With Your Script or Outline
You cannot plan your shots without knowing what your video needs to say. Before you open a spreadsheet, have a clear script or at minimum a detailed outline. In the world of video production, it is vital that you create a solid plan before doing anything else. There are a lot of elements that go into creating a successful video and developing a plan will ensure that you are well prepared and get all of the shots you need.
Read through your script and identify every scene, every key moment, and every piece of information the viewer needs to understand your story.
Step 2: Break Your Video Into Scenes
Start by listing the main scenes you will be filming. Adding reference images or sketches will make your shot list easier to scan, even if they are just rough photos you have taken on your phone. It will also help your crew visualize the shots you plan to capture. T
For a typical B2B brand video, your scenes might look like this:
- Scene 1: Establishing exterior shot of the office
- Scene 2: CEO interview on camera
- Scene 3: Team at work, collaboration B-roll
- Scene 4: Product or software demo
- Scene 5: Closing shot or call to action
Step 3: Identify Every Shot Within Each Scene
Now go scene by scene and think about every individual shot you need to tell that part of the story completely. You will know that you got the wide shot, medium shot, close-ups, eye level shots, and whatever other shots you need to tell your story. Film sets are hectic places where everything that can go wrong often does. With a good shot list, no matter what disaster strikes, you can make sure you get complete coverage.
For each shot, ask yourself:
- What does the viewer need to see here?
- What size shot best communicates this moment?
- What angle gives this the right emotional feel?
- Does the camera need to move or stay still?
- What is in the background and does it matter?
Step 4: Build Your Shot List in a Spreadsheet
Create your shot list in a spreadsheet so you can organize and easily rearrange the details of what is required for every shot. When anyone from the crew looks at the shot list, they should quickly understand the director's vision and know what they need to do to help bring it to life. Choose a scene from your script and open a new spreadsheet. The core elements are the columns, and each individual shot gets its own row.
Your spreadsheet columns should be:
Shot Number | Scene | Location | Shot Size | Camera Angle | Camera Movement | Description | Cast | Lens | Setup Time | Notes
Keep it as a simple Google Sheet or Excel file. You do not need expensive software. What matters is that every row is filled in with enough detail that someone who was not in the planning meeting could pick up this sheet and execute each shot.
Step 5: Organize By Location, Not By Script Order
This is a tip that separates experienced shooters from beginners. A shot list should first be organized by filming location, as grouping shots in the same location makes it easier to film everything you need at once.
If your script calls for shots in the conference room in Scene 2 and again in Scene 7, capture all of those shots in one block. Moving equipment between locations is time-consuming. Your shot list should reflect the most efficient order to capture footage, not the order it will appear in the final edit.
Step 6: Prioritize Your Most Critical Shots
Prioritize your shot list based on the shots that are most crucial to telling the story and start with them, as they are essential for narrative clarity or emotional impact.
If your subject is only available for a limited window, make sure the shots that require them are at the top of the list. If natural light is important to a particular exterior shot, plan to capture it at the right time of day.
Step 7: Scout Your Locations in Advance
It is extremely important to scout your shooting locations beforehand and contact any property managers about any recording policies or restrictions. You have a right to film in public spaces and objects that are in plain view, but please be respectful of people's privacy.
A location scout also lets you add specific details to your shot list. You will know where the light comes from, what the background looks like, where you can position the camera, and what obstacles might get in the way.
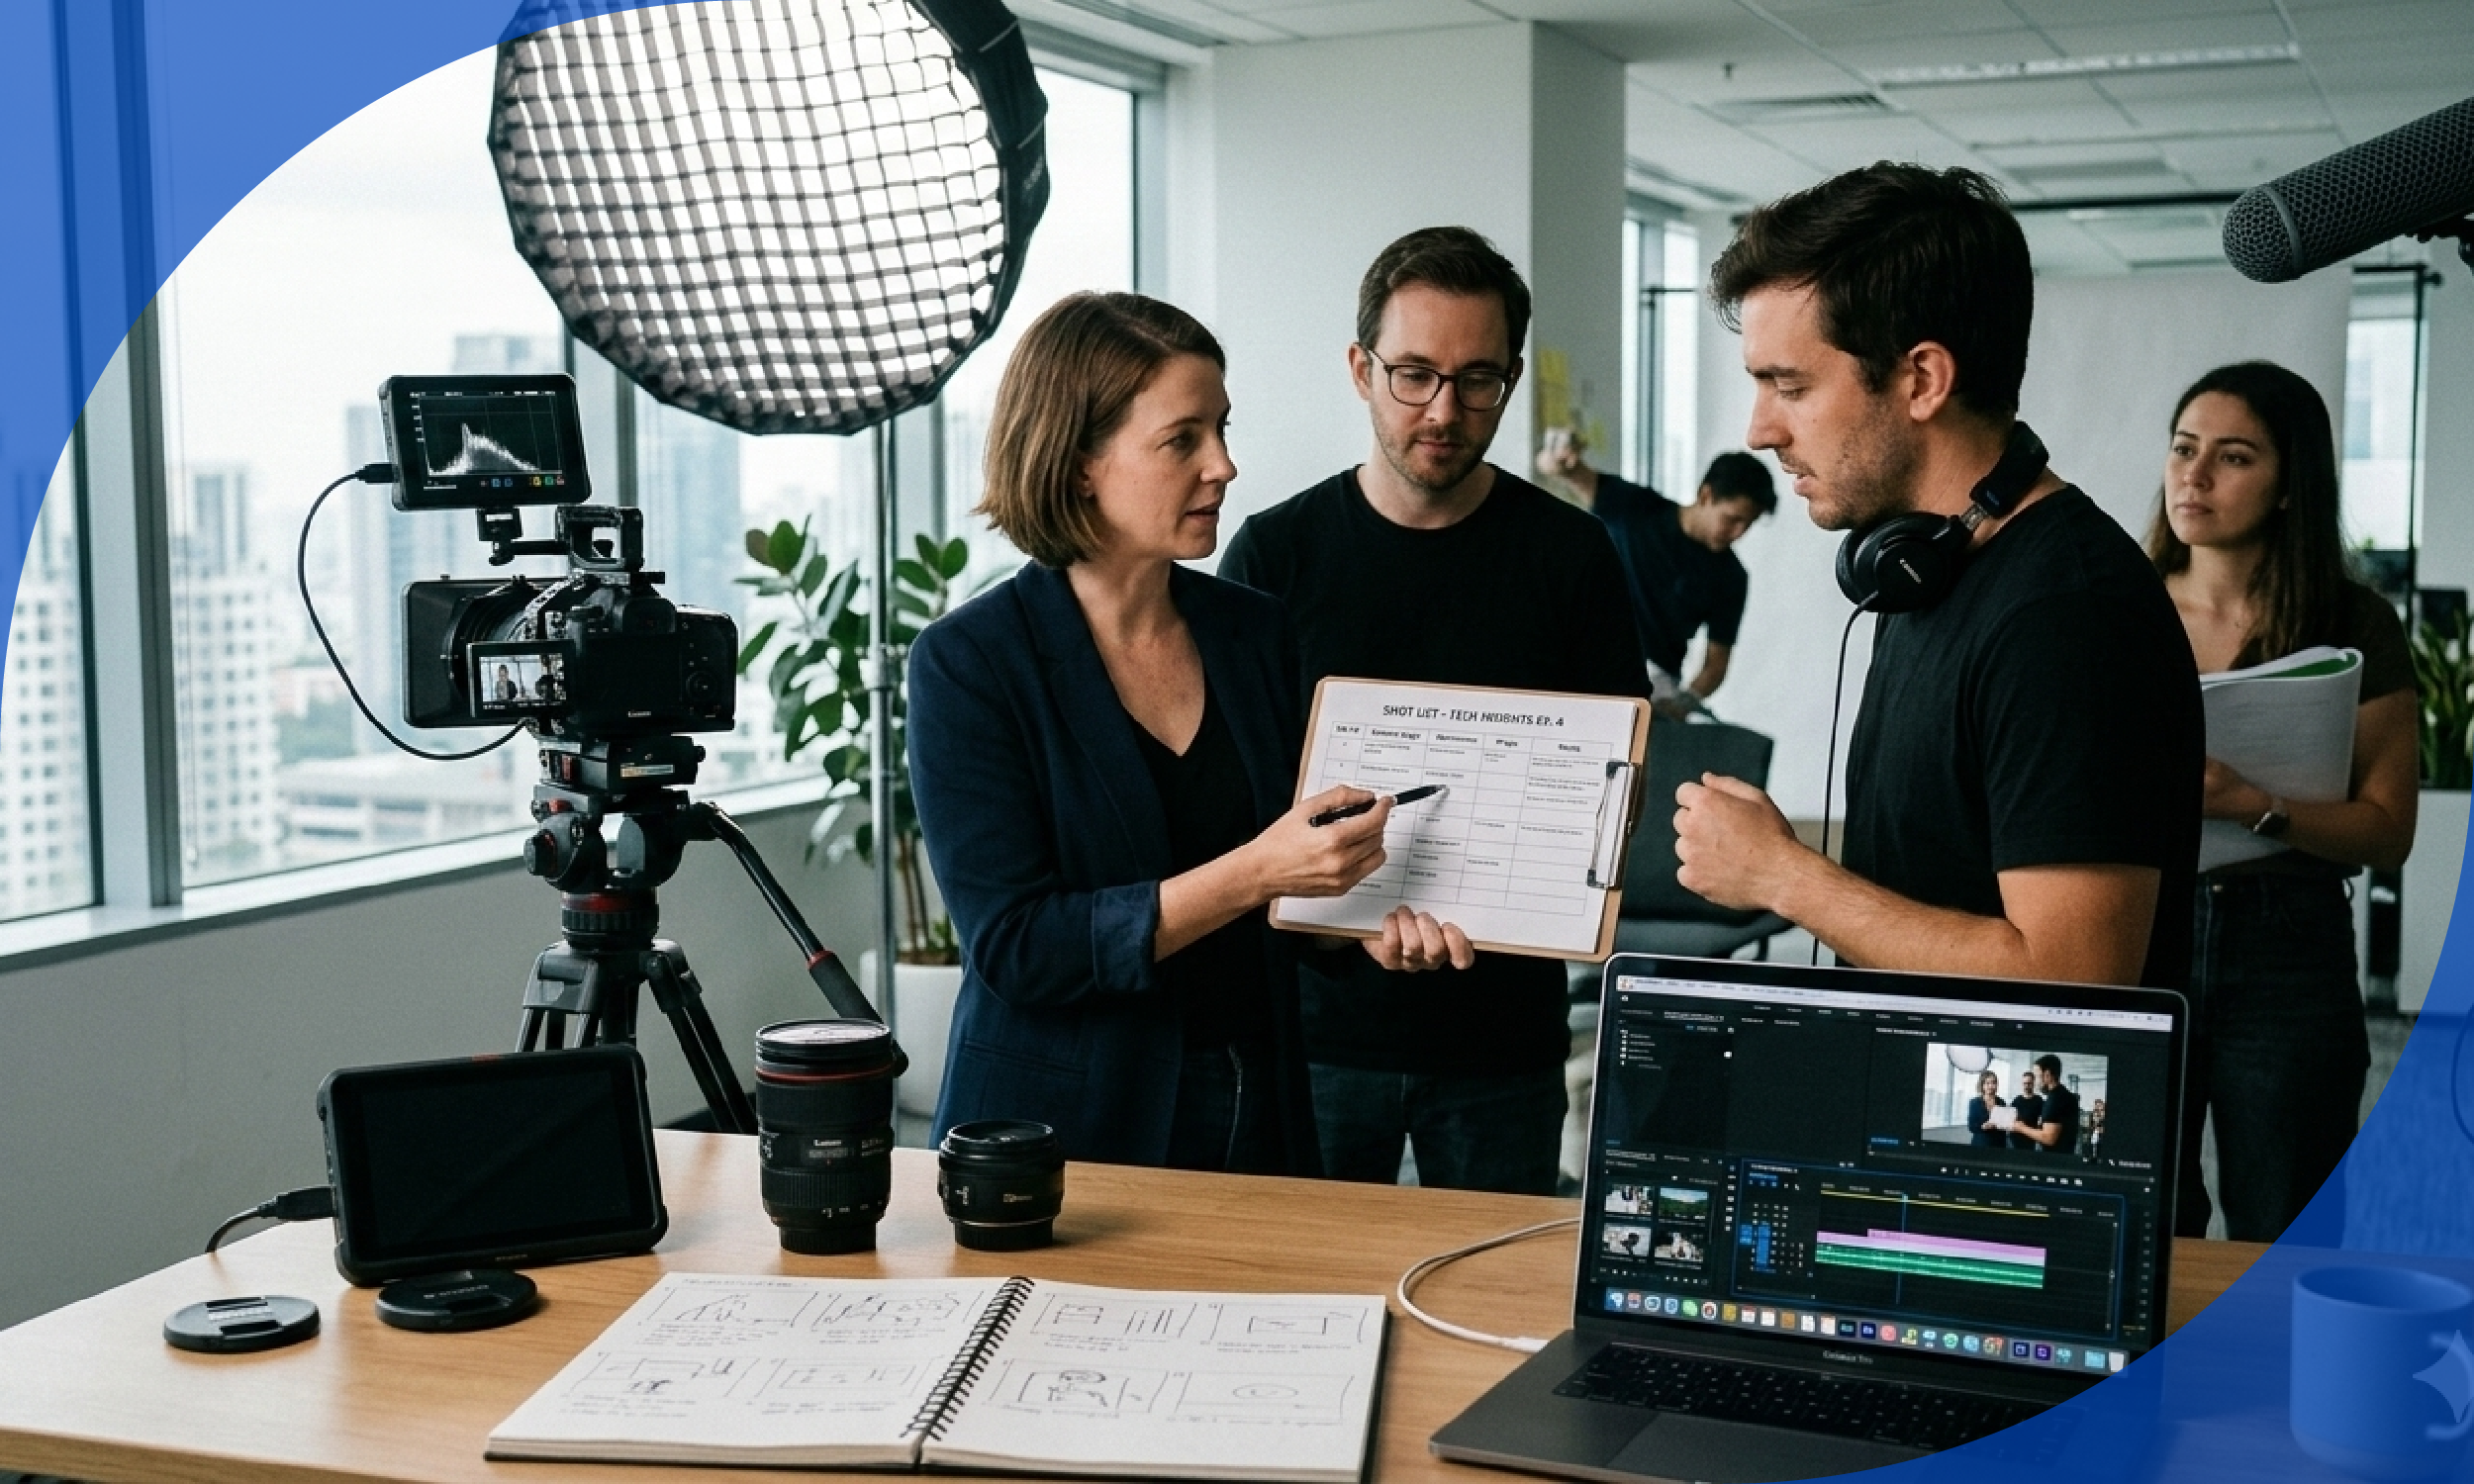
Step 8: Share the Shot List With Your Entire Team
While a shot list is usually the responsibility of one person, it is important that everyone on the production team sees it so they understand what is needed of them on the day. The director uses it to guide their creative vision. The cinematographer plans camera angles and lighting setups. The camera crew understands camera shots and setups. The art department prepares sets based on visible shots. The production manager creates a shooting schedule. The editor uses it to guide post-production and shot selection.
Even on a small two-person shoot, sharing the shot list ensures both people are working toward the same goal without constant verbal check-ins interrupting the creative momentum.
Step 9: Treat the Shot List as a Living Document
Shot lists can and should be a living document during the pre-production process. Variables come into play with any production and the goal is to eliminate as many of them ahead of time.
As you learn more about your locations, your subjects, or your available equipment, update the shot list. On the day of the shoot itself, cross off completed shots as you go and be willing to adjust if something is not working.
Easy to Use Shot List Template
Here is a easy-to-use shot list structure you can replicate in Google Sheets or Excel right now:
Shot List Tips for Specific Video Types
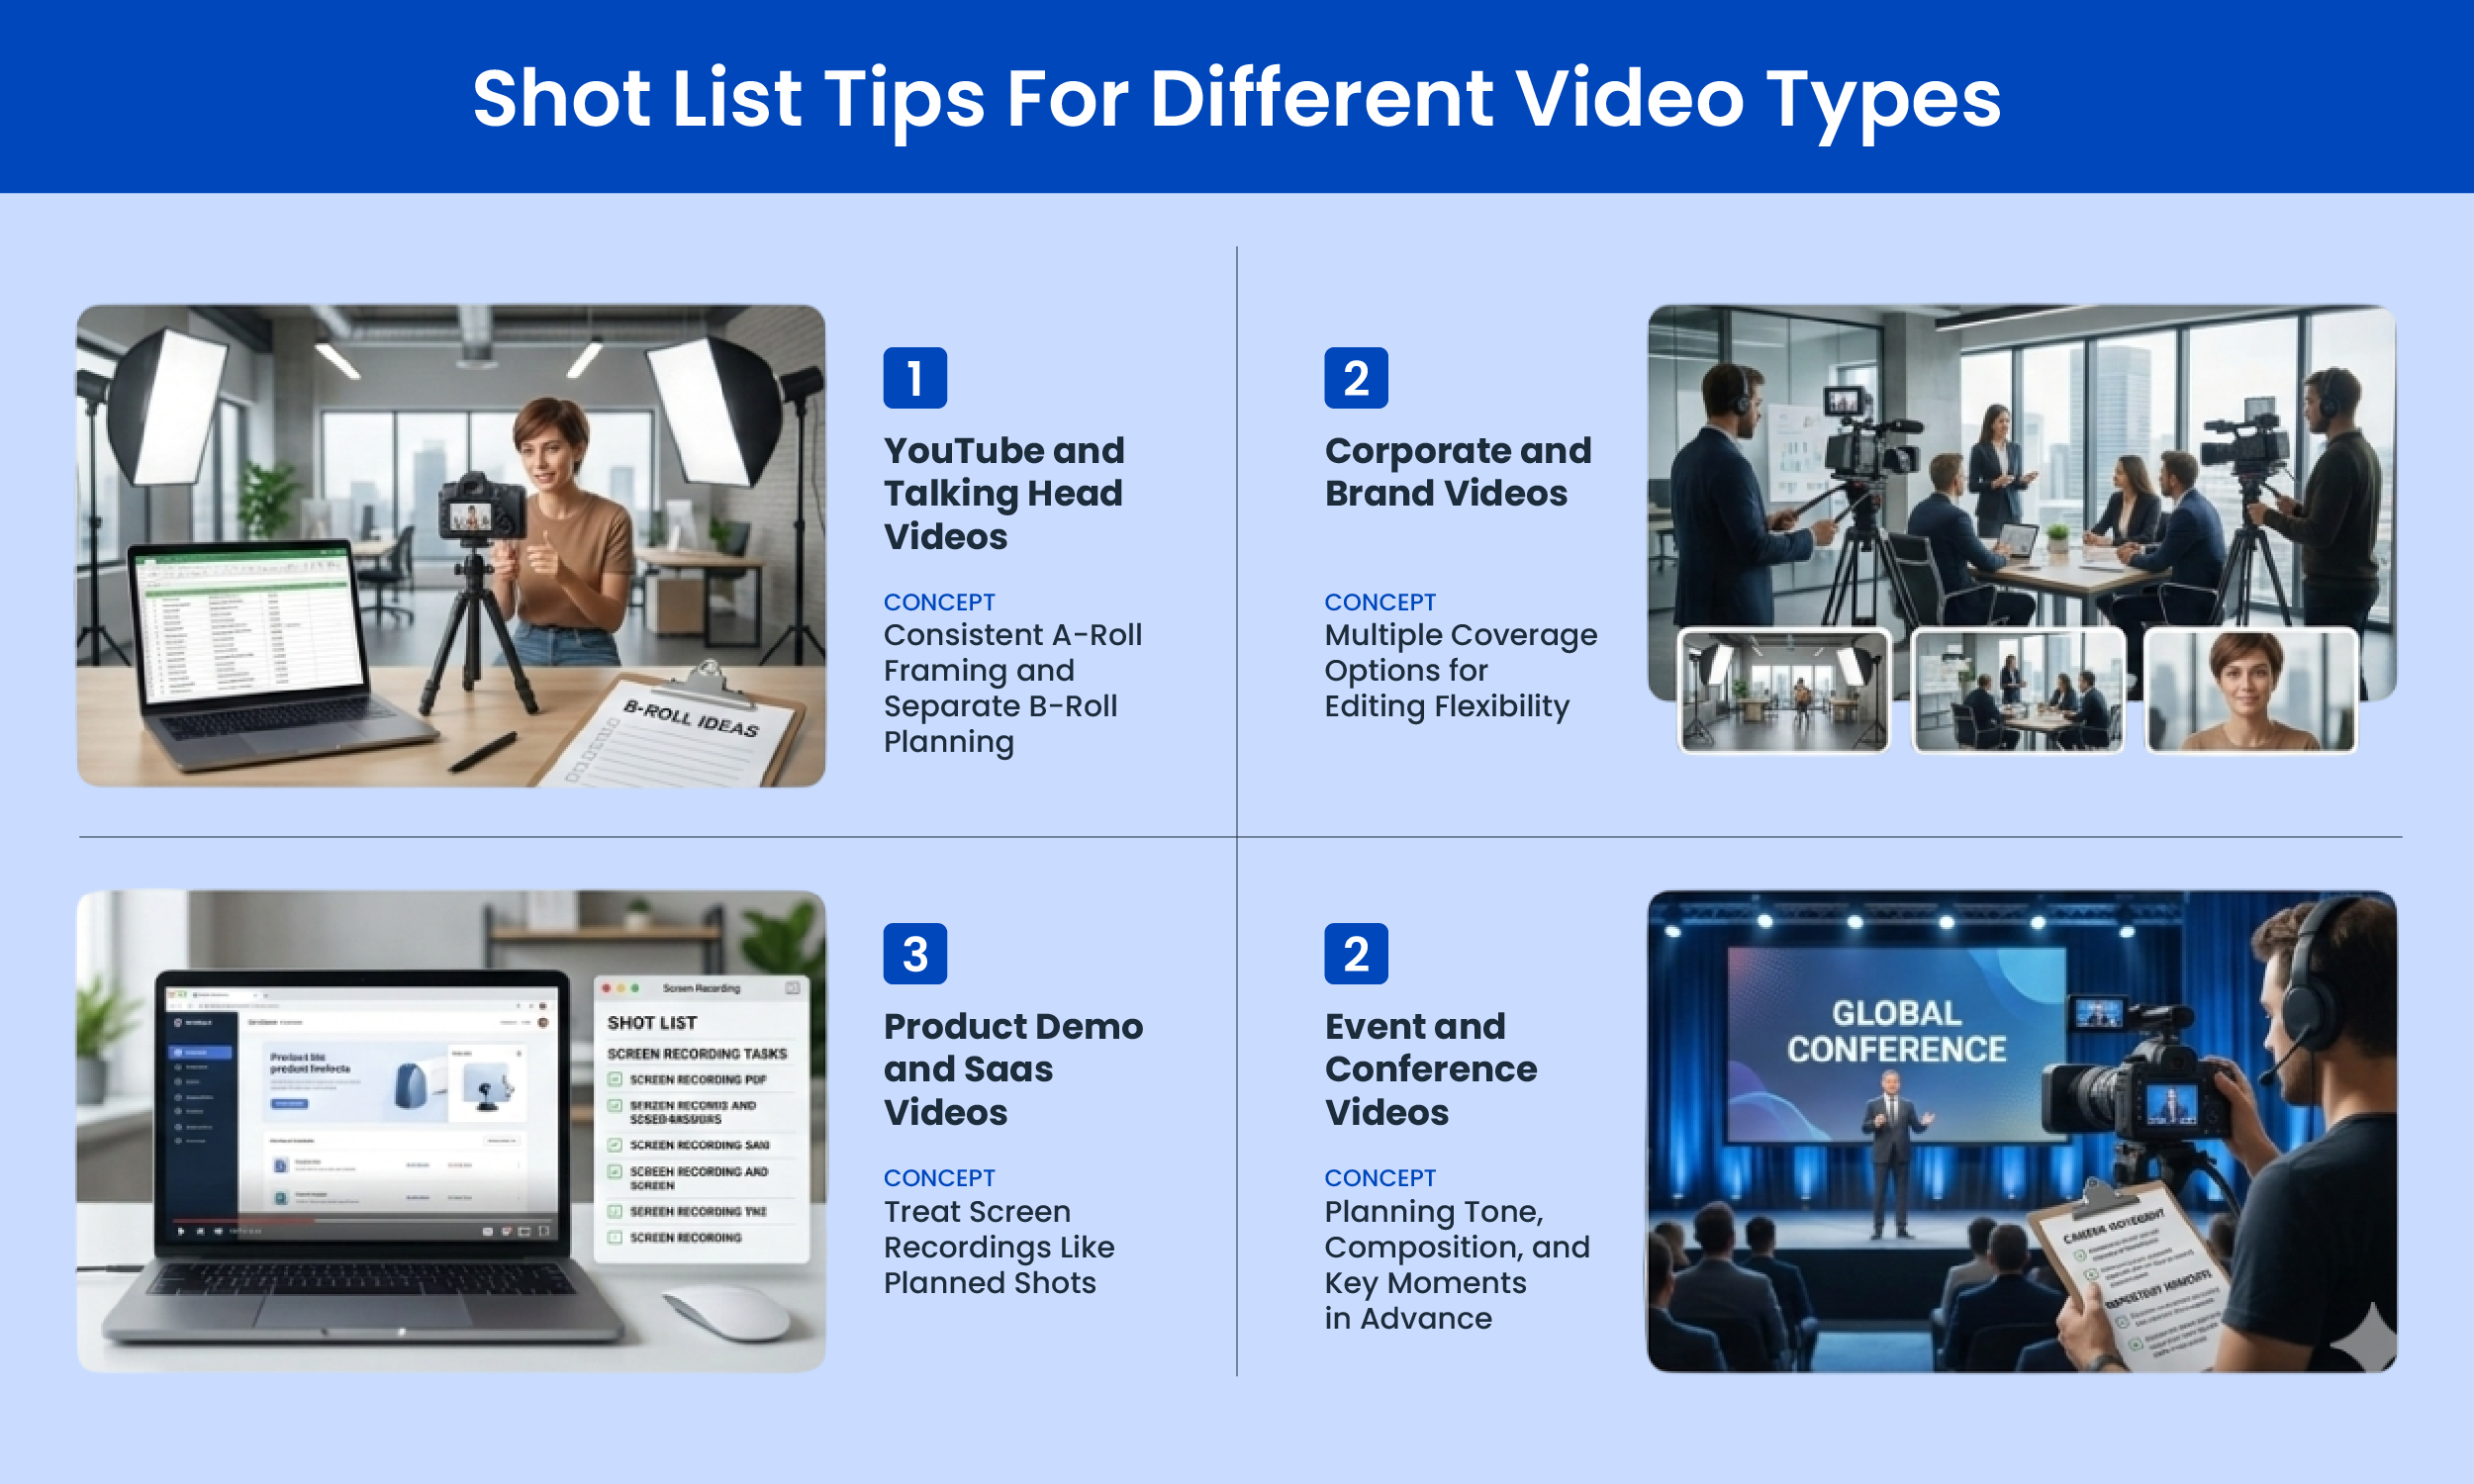
For YouTube and Talking Head Videos
Tutorial shot lists work best when they are simple and structured around teaching clarity. Consistency in framing and sequencing supports learning by reducing visual distractions.
Keep your A-roll shots consistent throughout your talking head sections so the viewer is not distracted by shifting framing. Plan your B-roll shot list separately and attach it as a second tab in your spreadsheet.
For Corporate and Brand Videos
Plan for at least three coverage options for every important scene: a wide establishing shot, a medium shot for context, and a close-up for detail and emotion. This gives your editor maximum flexibility without requiring a reshoot.
For Product Demos and SaaS Videos
List every screen recording you need as its own shot. Treat screen recordings exactly like camera shots with a shot number, description, and notes on what the screen should show. Many B2B video editors have been burned by missing a product screen recording that cannot be easily recreated after the fact.
For Event and Conference Videos
Add any specific details about how you will film on the day. These might be reminders about the tone, mood, composition, or how the camera should move through the scene. Refer back to your script or storyboard to ensure you have covered everything. There is nothing worse than finishing a shoot and realizing you have missed a critical shot.
Common Shot List Mistakes and How to Avoid Them
Mistake 1: Skipping the shot list entirely because the shoot feels simple
Even a 60-second social video benefits from a shot list. Three shots planned are better than ten shots improvised.
Mistake 2: Writing descriptions that are too vague
"Interview shot" tells your operator nothing. "Medium shot of subject from waist up, slightly right of center frame, eye level, static, looking just off camera to the left" gives them everything.
Mistake 3: Organizing shots in script order rather than by location
Group every shot that happens in the same location together on the day, regardless of where it appears in your final edit.
Mistake 4: Not accounting for setup time
Each shot will require a different lighting setup, even if the location remains the same. Some setups, such as a change in location, will take much longer as the production design department will also need time to adjust. Highlighting the setup times allows the first AD to schedule the day's shots as best as possible.
Mistake 5: Forgetting to plan for B-roll
Most shot lists cover A-roll interviews well and completely neglect B-roll planning. Build a dedicated B-roll section in your shot list for every scene.
Mistake 6: Never sharing the shot list before the shoot
If your team sees the shot list for the first time on set, you will spend the first 30 minutes of your shoot day answering questions that could have been resolved in a 10-minute review call the day before.
Tools for Creating and Managing Your Shot List
Google Sheets or Microsoft Excel - Free, simple, shareable, and works for the vast majority of video productions.
StudioBinder - https://www.studiobinder.com I The most powerful dedicated shot list tool available. Used by professional productions worldwide. Has a free tier.
Milanote - https://milanote.com I Visual shot list tool that lets you drag in reference images next to each shot. Great for visual thinkers.
Boords - https://boords.com I Combines storyboarding and shot listing in one tool. Strong choice for creative teams who want visual planning.
Celtx - https://www.celtx.com I Full pre-production suite including shot lists, scripts, and scheduling. Good for longer productions.
Frequently Asked Questions
Q: Do I really need a shot list for a simple one-camera video?
Yes. Even solo creators benefit enormously from a shot list. You will capture more useful footage, forget fewer shots, and spend less time in the edit scrambling to cover gaps.
Q: How long does it take to create a shot list?
For a short social video or YouTube tutorial, 20 to 30 minutes. For a full brand video with multiple scenes and locations, plan for two to four hours of careful shot list preparation. That time pays for itself ten times over on shoot day.
Q: What is the difference between a shot list and a storyboard?
A storyboard is very similar to a shot list, however, the storyboard contains sketches or images of each shot and how it should be composed. Storyboards include a lot of the same information that a shot list may include, but storyboards often provide more direction. A shot list is text-based and logistical. A storyboard is visual and illustrative. For most B2B video teams, a shot list is sufficient. Storyboards are most useful for narrative or scripted productions where exact visual composition matters from frame to frame.
Q: Should I stick to the shot list exactly on the day of the shoot?
Use it as your anchor, not your cage. The shot list ensures you never miss a critical shot. But if something unexpected and better presents itself on the day, capture it. Shot lists function as living documents that adapt to production realities while maintaining their core purpose as organizational tools. You might have to make adjustments for weather changes, location restrictions, or equipment issues, but the fundamental structure stays intact.
Q: How many shots should a typical brand video shot list have?
A one to two minute brand video typically requires 25 to 50 planned shots including A-roll and B-roll. A five minute video may require 80 to 120 planned shots to give your editor full flexibility. Always plan more than you think you need.
The Best Videos Are Built Before the Camera Rolls
The footage you capture is only as good as the plan behind it. A shot list is not busywork. It is the document that turns your creative vision into something your camera operator can execute, your editor can work with, and your audience can experience without noticing all the planning that made it possible.
A shot list is an important document to a film production, but it is also a creative exercise for the director and cinematographer. It challenges you to think about how particular camera angles can tell the story, make a moment more impactful, or reveal something about a character.
Start with a simple Google Sheet on your next shoot. Use the template in this guide. List every shot, every angle, every location. Show up on set with a plan. Then execute it.
The difference between the videos your audience skips and the ones they share almost always comes down to what happened before anyone pressed record.
Found this guide useful? Bookmark it, share it with your video team, and bring the shot list template to your next production. If you are just getting started with video for your B2B brand, this single habit will immediately separate your content from the competition.